Saturday, February 11, 2012

P.E.O.P. -- How many drops of water can sit on a face of a penny?


One of the discrepant events that works well with Smarter Science’s Predict – Explain – Observe – Explain (P.E.O.P) templates is “How many drops of water can sit on the face of a penny?” This activity is simple to set up; all you need is some pennies, medicine droppers and water. The unexpected results will lead to endless fascination, excellent questions, numerous investigations, opportunities to record, plan, design, gather data and experiment as well as  interpretation by comparing, contrasting, analyzing, evaluating, and the communication skills of discussing, explaining, reflecting and reporting.
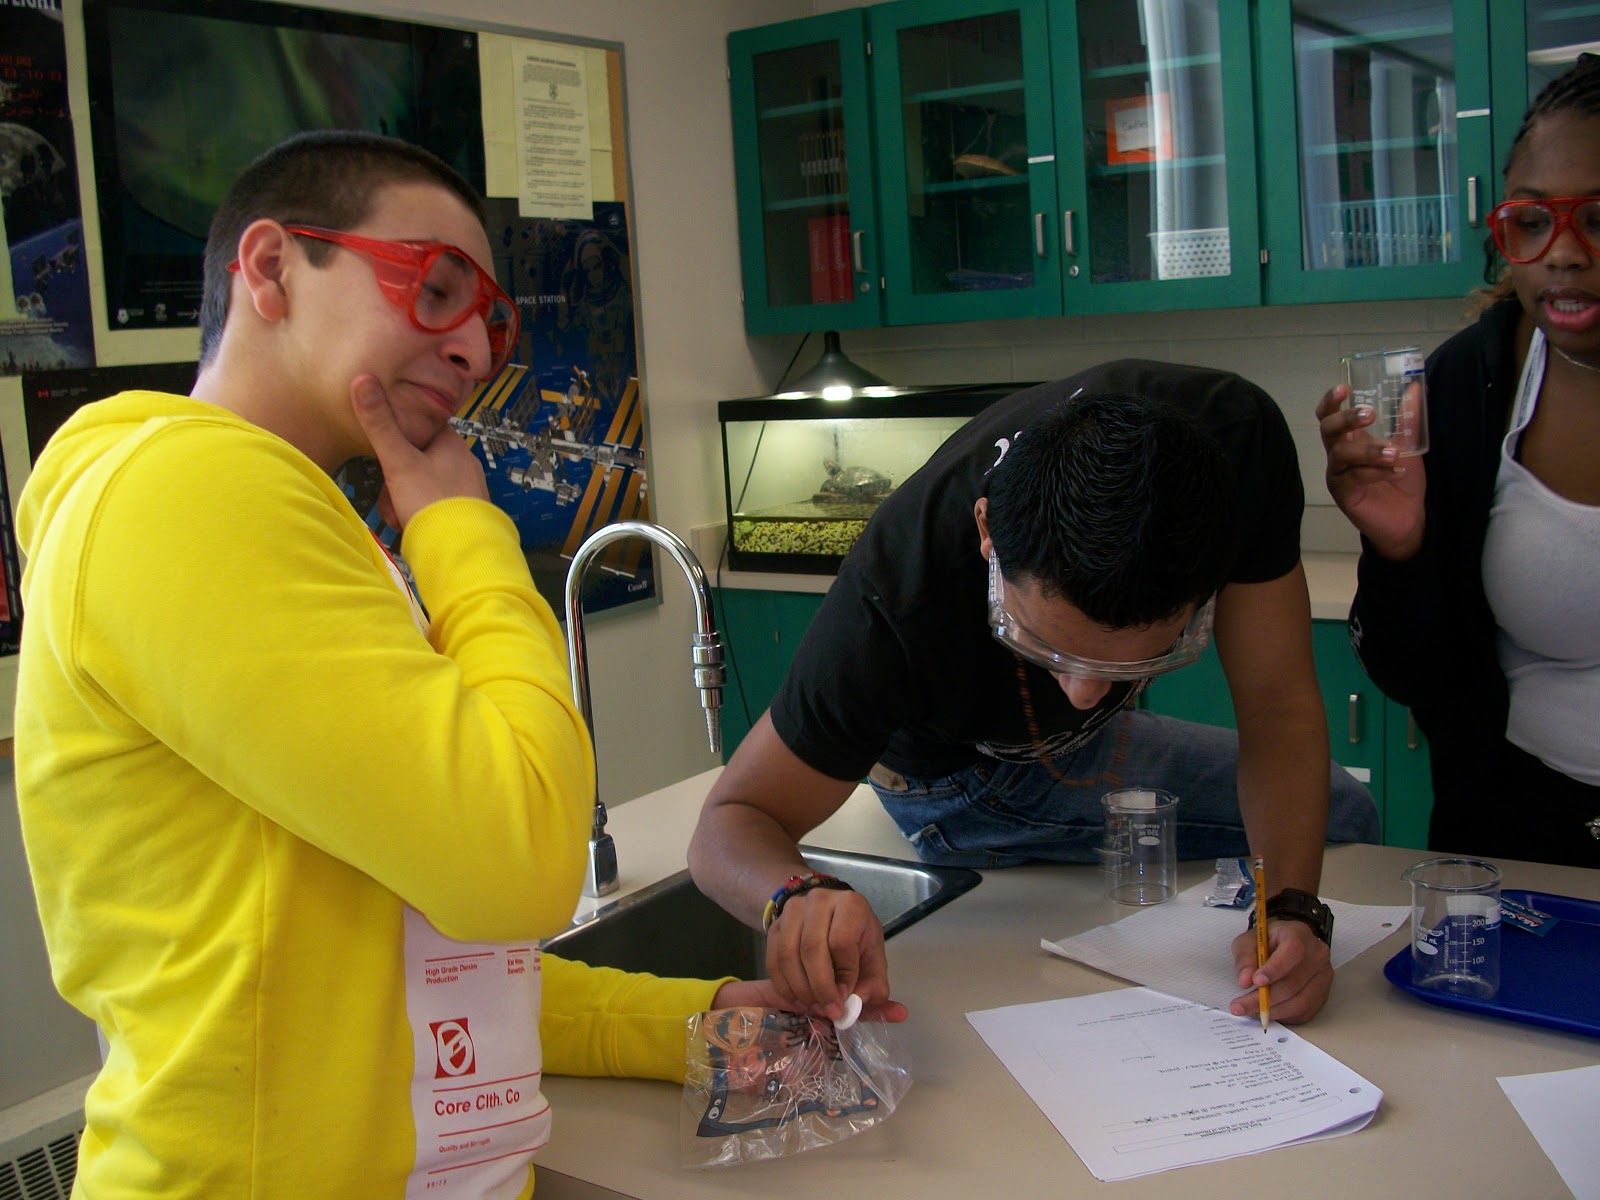
My grade nine applied science class performed a P.E.O.P. such as this as part of their Culminating Performance Task (CPT) this past semester. The students were given one Canadian penny, a medicine dropper and the P.E.O.P. template at the introduction of the activity. This allowed all the visual learners to see just what size the dropper and the penny were prior making their predictions.
Students were instructed to make their predictions using an “If . . .then . . “ statement in box one of the template and to include a diagram. Predictions ranged from 2 to 8 drops with the mean being 4 drops of water.
In box two of the template they were to explain why they had made their predictions. Most of them wrote something along the lines that “pennies are small so not much water would fit on them”. In my class of 19 students there were neither outstanding or startling predictions nor explanations.
After completing box one and two of the template the students then got beakers of water and began their experiment. This may have been the only moment of time, during the entire semester, that my classroom was silent! The students were intent on this task, it thoroughly captivated them. Quite frankly they couldn’t believe what they were observing! They wanted to repeat it over and over again to ensure that their results were indeed reproducible, just like “real” scientists! Eventually, yet begrudgingly, I had them stop their experimentation so they could complete their written work and thereby provide me with documentation towards their final mark. 
In box three of the template the students recorded how many drops of water they were able to fit on the face of a penny, incredibly the highest number was 54! Although each and every student had disproved their initial prediction they were proud of their accomplishment and insightful in explaining their reasoning into why their predictions were wrong.
This simple P.E.O.P. allowed my students to not only engage in a rich, authentic task but it also allowed them to demonstrate their critical thinking skills while demonstrating how they have evolved into real scientists over the semester, not only in the all of their actions that are described above but also in the fact that they are no longer discouraged when their initial hypotheses is wrong, an outcome I had despaired of achieving!


Sunday, February 5, 2012

P.E.O.E. on the Process of Drying Fruit


Have you used the Predict – Explain – Observe – Explain science process so eloquently summarized up by the Smarter Science student–friendly template? Also known as the P.E.O.P., this simple method really gets your students to think, and provides a means for you to access their critical thinking skills.
Recently I used the P.E.O.P. template with my grade nine applied students during an investigation into drying fruit. We had already studied the water cycle so the students were familiar with the term and process of “evaporation”.
On order to access their prior knowledge I initiated a class discussion into dried food. Our class is very multicultural but everyone had some form of dried food they were familiar with, most commonly dried banana, dried papaya, dried mango, raisins and beef jerky. Together we brainstormed about the “drying” process. “What happens when food is dried?”
 The analogy I used was, “What happens when clothes are dried?” The students were quickly able to extrapolate that if drying clothes means removing the water then drying fruit could mean the same thing. There was some discussion around the “juiciness” of fruit and whether the juice is just fruit-flavoured water.
The students worked in pairs for this activity. They had previously been instructed to bring in a fresh fruit or vegetable from home. Since half of the class forgot to bring something in the instructions were to pick a partner where at least one of you had a fruit or vegetable. The produce our class worked with included oranges, carrots, bananas, apples and celery.
Using the first square of the Smarter Science P.E.O.E., Predict, the students made their predictions by making an “If . . .then” statement in this format:
If my apple is sliced up and dried then it will . . .
The students were also expected to draw a picture showing what would happen.
In the second box on the P.E.O.E., Explain, the students had to explain WHY they had made their predictions. This is our first glimpse into their thinking process!
Once the first two boxes of the P.E.O.P were completed the students were instructed to prepare their fruit in whatever way they thought would be most suitable for drying. This caused some initial confusion: Should we peel it? Should we slice it? Should we cut it in half? Because the students are to take ownership of their learning my reply was consistently, “What does your partner think?” Eventually all of the pairs were able to take a risk and make a decision.
In the third box of the P.E.O.E, Observe, the students had to make some initial observations about their prepared samples. Although they were told only to rely on physical properties (those they could detect with their senses) the fact that I had put out our electronic balances that day allowed many of them to infer that recording the initial mass of their samples might be a good idea. Other observations the students made included colour, smell, and texture.
 
When the students returned to class on Monday they rushed to the windows to see what had happened to their samples over the weekend. Some of them wanted to eat their results right away! Pairs with differing types of samples were comparing their changes with no prompting from me. In fact, the students quickly weighed their dried samples and started calculating the amount of water lost without any top-down instruction. The learning just flowed. 
The students recorded their final mass in the third box of their P.E.O.E. as well as any other differences they observed.
In the final box, Explain, the students revisited their initial prediction (box 1) and stated if it was correct or not. They used the evidence they had collected to justify what had happened to their predictions. This is where their critical thinking skills are showcased!
Once again, Smarter Science had allowed the students to OWN their learning! How have you used the P.E.O.E  in your classroom?

How does particle size affect the rate of dissolving? -- An Student Designed Inquiry


 As part of the Culminating Performance Task my grade nine applied science class used the Smarter Science emergent scientist templates (poster set three) to design and conduct an inquiry into the effect of particle size on the rate of dissolving. The solute we dissolved was store bought Alka-Seltzer tablets and the solvent we used was water.
Due to the nature of the learners in my class I assumed that some of them would have no prior knowledge of Alka-Seltzer. So I started the class by showing them the box I had purchased from the drug store, then I opened the box and showed them the packages within and finally I opened the packages and showed them the tablets. Next I showed them Alka-Selters advertisements from Youtube then I dropped one of the tablets into a beaker of water and demonstrated how to time the dissolving process from beginning (initial time) to end (final time). 
While demonstrating the last step I invited the students to pull out their digital devices and use the timers on them to help with the timing. This step allowed the students to become familiar with the timing devices they didn’t even know they had, as well as become aware of the importance of starting and stopping the timer at precisely the right moment in order to record accurate results. Because I had a limited number of tablets available and an even more limited budget with which to purchase more I wanted to ensure that no tablets would be wasted during the actual lab due to failure to record the dissolving time. 
Using the Smarter Science template the students determined that the independent variable for their investigation would be the particle size while the dependent variable would be time (rate). The controlled variables would be:
1.      Size of beaker
2.      Volume of water
3.      Temperature of water
4.      Mass of tablet (predetermined by pharmaceutical company)
5.      Timing device
Each group was given four tablets for their investigations. The particle sizes they would experiment with were:
1.      Whole tablet
2.      Whole tablet broken into halves
3.      Whole tablet broken into quarters
4.      Whole tablet crushed
Each group decided what values to give to their controlled variables and recorded them on the Smarter Science template. Once everything was planned and recorded in an intelligible fashion the students were given their four tablets and got down to some serious science.
This lab worked very well. After performing and recording the investigation the students cleaned up, washed their hands and began analyzing their results. Because most of these students are visual learners I had them use their data to construct a line graph. The results were universal, the crushed tablet dissolved at a much greater rate than any of the other formats. In their written report the students reflected how this knowledge could be used in their daily life. Most have decided to chew their prescribed tablets in the future instead of swallowing them whole. 
 
What labs have your students designed and conducted to investigate the effects of particle size on the rate of dissolving?
Can you recommend any less expensive solutes?

Friday, December 30, 2011

Modelling Expansion of the Universe – blog post #48

Teaching The Big Bang Theory to Ontario grade nine science students forces a teacher to embrace their sense of humour. First one must address the prior knowledge the students have which is: The Big Bang Theory is a television show. All good teachers know that they need to meet their students where they are and I had anticipated that my students would be familiar with this tv show so I printed out the lyrics for the theme song before class. The students were happy to sing it; following the bouncing ball on the smart board is always a fun activity!
Eventually we got into the fact that there is actually a theory about how the universe was formed and it is the Big Bang Theory. (It all started with a big bang!) My students were amazed by even this little snippet of information! As I explained the Big Bang Theory to them with the help of numerous visuals and video clips, while constantly referring back to both the lyrics and what they had learned in the chemistry unit, their engagement was obvious by the questions that came pouring out of them. My favourite was: “Why didn’t anyone ever tell me about this before?”
After spending an entire period on the Big Bang Theory I left the class with the thought that the universe is expanding and the promise that tomorrow would be a hands-on activity where we would explore this phenomena. In order to organize a hands-on activity that models how the universe is expanding to students with weak mathematical skills I used my best friend, the internet, to help me come up with a great idea! (This activity is not original to me, it is found on many web pages, I was unable to track down its origin.)
1.      Initiate and Plan = Engage

Together the class used the Smarter Science template to design a testable question. It was: “Can we model how the universe is expanding?”
The variables were:
Independent - Amount of air in the balloon
Dependent - distance between the points
Controlled - shape of balloon and keeping balloon tightly sealed during measuring
In small groups, the students were given a new balloon and a marker. Each group marked six random points onto their balloon. One was labelled home while the other five were labelled A, B, C, D and E in no particular order. 
Using a string to measure the distance between two points

Using a ruler to measure the string


Teamwork!
The surface of the balloon represented a 2-dimensional universe. Each point represented a galaxy with home being the Milky Way.
Each individual then made a hypothesis regarding what would happen to the distance from home to each of the other galaxies if the universe expanded. 

2.      Perform and Record = Explore

Recoding the data
They students measured and recorded the distance from home to each of the other five points. This measurement was taken at time one. We used this data sheet. 
An assigned group member then inflated the balloon to about the size of a grapefruit. This represented time two. The distance from home to each of the five points was measured again, while the air in the balloon was sealed inside.
This procedure of blowing more air into the balloon and measuring the distances was repeated six times and the data was collected in an observation table. 

3.      Analyze and Interpret = Explain
The students graphed their data in a simple line graph of time versus Distance from home point. They used a different colour for each line on the graph and a key to define each line.

4.      Communicate = Extend
In their final report the students had three questions to discuss. They were:
1.      How did the distance from the home dot to each of the other galaxies change each time you inflated the balloon?
2.      Did the galaxies near home or those farther away appear to move the greatest distance?
3.      How could you use this model to simulate the Big Crunch, a time when all the galaxies might collapse in on themselves?

This activity was very successful. It helped students who are not destined to be rocket scientists of astronomers understand our concept of an expanding universe. Although they used simple mathematics, measuring and line graphing, it helped them understand why I am always telling them that a lot of what we know about space has been proved mathematically.
I recommend this activity for hands-on learners of all ages!


Canadian Space Agency Sponsors Guest Speaker at Our School! – blog post #47

 Just three days after returning from their Christmas holidays the science and math students at St. Pius X High School are in for a special treat! Sponsored by the Canadian Space Agency, Adam Vigneron, graduate student at Carleton University will be speaking to a select group of senior St. Pius X High School students in the school library during period two.

Born and raised in Wilcox SK, Adam holds a bachelor’s degree in Engineering Physics from the University of Saskatchewan.  While at the UofS, he was an active member of their Space Design Team (USST), competing in a space elevator challenge (focus area: wireless power transmission) and a Canadian nanosatellite competition.  Adam also spent a term studying space physics at U of Tromsø in northern Norway.  In his leisure time, Adam enjoys waterskiing, playing cards, curling, and is an avid scuba diver.

While at St. Pius X High School, Adam will also be facilitating workshops on Solar Max with two of our grade nine classes. During these interactive 75 minute workshops students will be engaged in a variety of hands on activities. He will also be lunching with the science and math teachers; they are looking forward to discussing what essential skills he took away from high school with him.

If you are going to be in Ottawa on Wednesday, January 11, 2012 and would like to be invited to Adam’s 10:20 a.m. presentation please send me a direct message on twitter (@EurekaTeacher) with your email address and I will extend one to you personally.

You can be sure that there will be a follow up blog posting about this exciting day!

From the Space Quarterly Magazine -- Education Section

During the summer of 2011 I had the opportunity to attend the Canadian Space Educator’s conference which is sponsored and held at the Canadian Space Agency (CSA). It was fantastic and all expenses are covered by CSA! Subsequently I was interviewed by Randy Attwood from Space Quarterly magazine and am cited as a primary source for his article on the conference. The article appears below.

32 Space Quarterly December 2011
Education
Inspiring the Next Generation of Space Explorers
By Randy Attwood
Randy Attwood has been following the space program for over 40 years. He has appeared on television and radio for over 30 years as a commentator. He is a Senior Editor at SpaceRef Interactive Inc. And Managing Editor of Space Quarterly.

While the space shuttle program was winding down earlier this year, NASA produced several videos profiling the people who worked on the program. Astronauts, mission controllers, and support personnel were asked why they chose to work in the space business. Many had the same answer: they had watched the first Apollo moonwalk at a very young and impressionable age. The idea of going into space stuck with them through school, and they made it their careers.
Now, with the remaining space shuttle orbiters heading to museums and the number of opportunities to fly in space reduced to a minimum, who will inspire today’s young people to follow the same paths to space? Not everyone wants to be an astronaut; some want to be engineers and technicians. But all have a story about a certain event or individual who inspired them to stay in school and follow their dream to space. For many, that person is a teacher.
Approximately every 10 years or so, the Canadian school curricula are revised. In the late 1990s, astronomy and space program material appeared in the grades 6 and 9 science curricula
for most provinces. Not all science teachers have a background in astronomy; so many teachers were suddenly facing classrooms full of eager students with a thousand questions. The teachers cried out for help.
One resource for teachers to turn to is the annual Space Educator Conference held at the Canadian Space Agency (CSA) headquarters in Saint-Hubert, Québec. This three-day conference held in early August provides an opportunity for educators to participate in workshops with CSA engineers and scientists. The conference covers space-related, curriculum-relevant topics at the primary and secondary levels.
Marilyn Steinberg is the Program Manager, Space Learning Program, at the CSA. In a recent interview with Space Quarterly, she talked about how it is a challenge to bring space to the students in the classroom: “Space is a natural hook because children tend to look outward. Space is not a concept; it is a context. From that context, you can explain and teach a vast variety of concepts that appear in the science, math, and technology curricula across the nation. The challenge for teachers,” she says, “is how to translate content so students can understand, engage, and apply it to their own experiences.

“The children are glowing with anticipation. They want to get their hands dirty; they want to think about the problem, they want to attack it. For a teacher who does not have a background in space, it is hard to satisfy the students’ expectations. The program we have developed here attempts in a variety of ways to address that. We give [the teachers] the opportunity to live, breath, and know space. We do this by offering the same kind of workshop that we would offer students. “We also want to make sure that the educator community has an opportunity to integrate with the scientists and engineers. The two communities speak vastly different languages. We take the time to train the scientists and engineers. They learn about curriculum, and they learn about teaching strategies. Ultimately, they are speaking the language of the classroom to the educators.”
One of the educators who attended this summer’s conference was Kay Stephen, a high school teacher from Ottawa: “The Educators Conference was amazing. My background is chemistry and biology so I didn’t know a lot [about space]. For teachers without a space background, the textbook is a good starting point. But things are changing all the time in space. After the conference, I felt current with what was happening in space and knew where they were going to next.”
An important aspect to teaching in Canada is STSE, which stands for science, technology, society, and the environment. (In the United States, they use STEM, which stands for science, technology, engineering and mathematics.) Essentially, STSE is the application of what the student learns in science to other areas, including his or her own environment and daily experiences. It is answering the question, what does this have to do with me?
Applying STSE to teaching space exploration is very important to Stephen: “That is what it is all about. That is where it all comes together. That’s where the kids take all the theory and apply it to real life.”
Stephen teaches applied-level students and says that without STSE, her students would not be engaged at all. “Every day, that’s all they want to do: get their hands on an activity, get their critical thinking engaged, and apply what they are learning.”
Stephen says that the highlight of this year’s conference was the workshop on Mars. “They
have an area that simulates the surface of Mars. They took us through the different labs where the actual research scientist made the presentation. There were no stupid questions. They spoke to me at my level. I can take the information back to my own grade 9 students. I was very impressed.”

The CSA does more than run the educator conference, though. Students can visit the CSA headquarters for workshops, and the CSA also sends presenters to schools. They perform 280 workshops a year. The educators who cannot get to the CSA can access online resources on the CSA Educator website.
And there are other programs for educators to use. The Tomatosphere project, which the CSA co-sponsors, has been active for the past nine years. Tomato seeds that have travelled in space are made available to students to grow and compare to similar seeds that have stayed behind on Earth. Students receive two packs of seeds; they conduct a scientific experiment and compare the germination rates of the two seed sets. Only after the experiment do they learn which pack of seeds had been exposed to a space environment and which were Earth seeds. During the nine year program, Steinberg estimates that 2 million students have participated in the Tomatosphere project.
A major project the CSA is working on for educators will be released a year from now. It
is a 3D interactive program that immerses the student into the space environment. With a Chris
Hadfield avatar as the student’s guide, they will learn to live on the International Space Station or fly the Russian Soyuz spacecraft. All along, they will be given problems to solve that require them to apply the scientific method and understand several important concepts. Their teacher will be linked in to monitor the students’ progress and act as Mission Control. The student avatars will join the Hadfield avatar and shrink down to either explore the internals of a green plant on the space station or examine the insides of a rocket engine on the Soyuz.
The challenge for the CSA? Canada is a large country, and there are thousands of teachers struggling to bring space and astronomy to their students. Unlike NASA, which has education centres spread across the country and a much bigger budget, the CSA is isolated on Montreal’s south shore.
“Many teachers don’t even know there is a CSA. [It’s] Canada’s best kept secret,” points out  Kay Stephen. “Canadian educators need to know that there are grants to get CSA scientists to visit your schools.”
The CSA is about to undergo potentially severe budget cuts. Hopefully the CSA programs, which are meant to help educators across the country inspire our future space scientists, will not be too severely affected.

All photo credits in this blog post: Kay Stephen