Showing posts with label teaching science. Show all posts

Friday, August 5, 2011

How Smarter Science Changed my Teaching Life OR How I got My Students to Stop Regurgitating and Start Thinking Like Scientists


As a passionate science teacher who came to teaching as a second career the one barrier I could never smash was “How do I get my students to think?”
 No matter what course I was teaching it seemed the students, who actually cared about their marks, just wanted to know what page the answers were on and had no interest in understanding the whys of science or the beauty of the universe. I’ve been teaching high school science in Ontario forever. I’ve experienced any number of Ministry mandated initiatives including four curriculum changes, streaming, destreaming, transition years, TAG and don’t even get me started on professional development. My list of credentials is as long as your arm, I’ve loved every course I have ever taken or given, yet still I struggled with “How can I get my students to think?”
 Then, in August 2010 I attended a two day work shop on Smarter Science. I came into the conference with no preconceived notions and having no idea what Smarter Science and the Smarter Science framework were. All I knew for sure was that “getting students to think” is a universal problem in our education system. For two days I engaged in hands-on minds-on Smarter Science activities. As a trained scientist everything they said and did made sense to me, here was the scientific empirical method presented in a non-threatening and engaging way with well constructed pedagogy to appeal to every age group from K – 12!
 Eureka! This could be the key to “getting my students to think” was my gut reaction. When school started up in September I was teaching courses and curriculum that I knew like the back of my hand. And although the names on the register change let’s face it, grade nine students are grade nine students. Despite our understanding of 21st century learners some things will never change about our minor niners. Gung ho, I used the Smarter Science framework. They got it! They really got it! My classroom became one of the most exciting places to be in our entire school So much so that every single day during every single class I would have to ask the students who were in the classroom that were not actually enrolled in the class to please leave the room!
 My students were using the Smarter Science framework to design their own inquiries! They would identify dependent and independent variables, set up controls, predict and plan the inquires prior to starting them, measure and record all the data using appropriate instruments, analyze and explain their outcomes, communicate their results, recognize sources of error, and even extrapolate what inquiry should be done next to lead on from their discoveries! Eureka!
 
The students were so engaged in the scientific process it was unbelievable. As a classroom teacher who is known for taking risks this is the biggest payback I have ever received. I had students and parents both thanking me for showing them how exciting science could be. I had teachers, administrators and superintendents visiting my classroom to find out how my students were achieving such incredible success in their science courses, my marks were through the roof and my students’ punctuality and attendance was second to none! 
 
I have used the Smarter Science framework with university, academic, applied and locally developed science courses. The results have been outstanding! Will I continue to use the Smarter Science framework in the new school year? To find out continue to visit my blog, or follow me on twitter@EurekaTeacher. I welcome your questions and look forward to meeting you at STAO 2011.

Monday, May 9, 2011

People's Choice voting Now Open in Google Science Fair 2011

Recently I had the pleasure of being the only Canadian judge in the Google Science Fair which is open to all 13 - 18 year olds worldwide.

The thousands of entries have been narrowed down to the top 60 and the public can now judge them for themselves.

You do not have to be a science teacher to be impressed with the awesome entries you will see here:
  • http://www.google.com/events/sciencefair/vote.html
Be sure to vote in each age category!

Send me a tweet @EurekaTeacher and let me know what you think of the entries.

Wednesday, March 2, 2011

Are Chemical or Natural Cleaners Better at Cleaning? – Posting 22

Today I used the Smarter Science framework to facilitate a lab with a grade nine science class that had never experienced this approach to science before. As usual in a classroom, the anecdotal comments told the real story of how things went. These comments ranged from:

“This is awesome!”

“Using the sticky notes and then moving them is such a great idea!”

“What do you mean; you aren’t giving us the procedure?”

“Shouldn’t we be writing more things down?”

“Can we do labs like this again?”

“It blew my mind!”

This is not to say that it was smooth sailing all the way. But let me fill in you on the details. In the Chemistry unit that we are currently studying one of the topics covered is that there are often safe,environmentally friendly alternatives to commonly used household chemicals. The question we investigated was: “Are environmentally friendly cleaners as good at cleaning as household chemicals?” Since this was the first time the class had used the Smarter Science framework my objective for the students was that they would learn to design and perform a fair test.

We had four cleaners to test. The cleaners were our dependent variable.

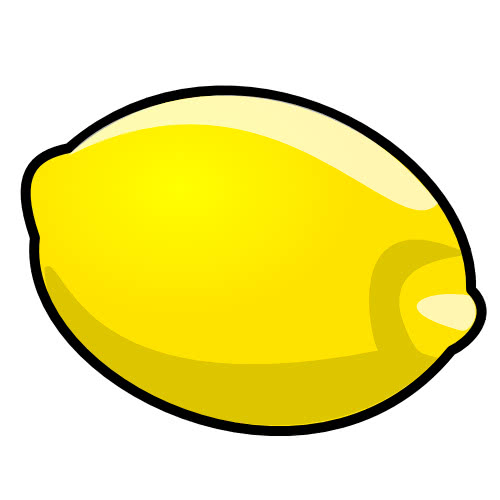
1. Slices of lemon (environmentally friendly)

2. White vinegar (environmentally friendly)

3. SOS pads (household chemical)

4. Scouring powder (household chemical)

I had the four types of cleaners on my front desk to provide a visual cue. This was especially helpful for my ESL students who were unfamiliar with the two household cleaners I brought in. (SOS pads and Comet). Photocopies of the Smarter Science Steps to Inquiry (set 3) and pads of small sticky notes were distributed to the students while the corresponding posters were mounted on the front board.

1. Initiate and Plan (ENGAGE)

We identified our objective as: “To compare 4 cleaners”. We recorded this on a sticky note and placed in the center of the star-burst diagram.

Together we brainstormed what factors would have to remain constant while testing all four cleaners in order for the test to be fair. These were the controlled variables. Our list read:

· Amount of cleaner used

· Amount of time scrubbing occurred

· How hard we scrub

· Type of motion used to scrub, ie. Circular or linear

· Type of surface cleaned, ie. Desk top, glass, floor tile

Each of these five control variables were recorded on separate sticky notes and placed around the rays of the star burst diagram.

Next, the students worked with a partner to decide what values they would give to each of these variables. They used the second page of their Steps to Inquiry handout to record agreed upon values. Our framework was nearly complete!

Turning to the last page of the framework (fish bone design) all the sticky notes were relocated. The dependent variable was stuck on the head of the fish, while the controlled variables were stuck along the bones.

The final instruction from me was: “Collect your materials and do the lab.”

2. Perform and Record (EXPLORE)

The students tied back their hair, put on goggles, collected one sample of each of the four cleaners and got to work. Questions that I was asked at this stage were:

“How much should I use?”

“What should we clean?”

“How hard should I scrub?”

“How long do I scrub?”

Each question received the same answer. “I don’t know. Check your design. Ask you partner.”

Initially the students were very confused by this. This was the first time they had been permitted to be in charge of their own experiment. Some groups were quickly empowered and got it! Others were like fish out of water. They wanted me to direct their every move. Just as I was about to cave-in and start directing them one of my weakest students from the previous semester dropped into the classroom to see what we were doing. I told the students she was the only one that could help them. This visiting student immediately grew two inches in height, tossed out the sucker she had in her mouth and took charge. Within three minutes everyone was happily scrubbing away while I walked around exclaiming, “Great work! Fantastic! Keep it up!” this positive reinforcement appeared to be an essential component to the lab.

Recording / Gathering data: Just as I was resting on my laurels the students started to demand what they needed to write down. “What do you think you should write down? What does your partner want you to write down?” was my reply. In some pairs of students one partner started dictating to the other partner what to write down, some started to draw tables, and one group even had the idea to rate all the cleaners on a scale of 1 – 5 and record how good they were!

After all the testing was complete the students cleaned up and washed their hands and sat down to consider what had just happened.

3. Analyze and Interpret (EXPLAIN)

Again, the students wanted some direction from me. I instructed them to go back to what our original question had been and see if they could answer it. The question was: “Are environmentally friendly cleaners as good at cleaning as household chemicals?”

The students looked at what they had recorded and started analyzing it from this point of view. A couple of the groups realized they had not recorded anything that would help them answer the question so they went back to where they had been scrubbing and started recording the results from their new, enlightened perspective. Somehow, in the excitement of doing the lab they had lost sight of what the question was.

I overheard students comparing and contrasting the merits of the four cleaners.

4. Communicating (EXTEND)

It came as no surprise to me that students in this applied-level science course are excellent oral communicators. With no prompting, groups shared their results with each other. The pros and cons of the different cleaners were debated; physical properties such as smell and stickiness were under discussion. Sources of error were even used as explanations for variations in results, although the students are as yet unaware that this is what they were doing!

Three of my ESL students looked a little confused by the discussion that was swirling around them. I told the boys that everyone was talking about the cleaners we had just tested and suggested that they do the same in their shared native language. What huge smiles rewarded me! (These students spend most of their day being told to only speak English, which is what they were here to learn.) Gleefully they started chatting amongst themselves. I can only guess that they were talking about the lab and judging from the manner in which they were pointing to their data I feel confident that the three minutes they spent not speaking English today provided them with some scientific enlightenment.

As the class drew to a close the students wanted to know what they had to hand in. Imagine their delight when I told them there was nothing to hand in! Tomorrow we will have a class vote on which cleaner worked best and the only thing they would have to do is put their hand up to vote.

From the perspective of a classroom teacher I am treating this activity as a formative or diagnostic event. My conclusion is that the Smarter Science framework will be very successful in this class, as the students learn to think and act like scientists, they will become increasingly independent and self-confident learners.

Monday, February 21, 2011

What to Teach in the SNC1L / SNC2L Science Courses – Post 20

My blog posting last week contained several tips for teaching the locally developed grade 9 and 10 science courses, in Ontario. Since then I have been contacted by several readers who have asked me, “But what am I going to teach them?”And that my friend is the big question!

The Ontario Ministry of Education provides us with well thought out course outlines as well as detailed course profiles. These resources are an excellent starting point, especially for the new teacher. But, due to the nature of the learner in these classes I suggest that these two high school science courses are probably the ones with the most flexibility built into their curricula.

There are five units of study set forth for each of the courses. In grade nine they are:

Unit 1 Scientific Inquiry: Science in Daily Life

Unit 2 Biology: Staying Alive

Unit 3 Physics: Electrical Circuits

Unit 4 Chemistry: Properties of Common Materials

Unit 5 Making Personal Decisions

In grade ten they are:

Unit 1 Scientific Inquiry: Science in Media

Unit 2 Biology: Living Together

Unit 3 Chemistry: Interactions of Common Materials

Unit 4 Physics: Using Electrical Energy

Unit 5 Community Action Plan

The Ministry’s intention for the course is that the first units (Science in Daily Life and Science in the Media) be interwoven throughout the course content. In the grade nine course students examine personal and workplace situations with an emphasis on health and safety, for both themselves and others. In the grade ten course relationships between the student and the environment, the effect of individual choices and actions affect the community, and an individual can make a difference in his or her community.

It did not escape my notice that when the entire high school science curriculum was overhauled by the Ministry in 2009 the only courses that were left untouched were the SNC1L and SNC2L courses. I don’t know why this is, but I am sure that the Ministry has their reasons. One consequence of their failure to act means that these are the only two courses offered in my science department that are not subjected to the “big ideas”. The “big ideas”, as every high school teacher in Ontario knows, are the over arcing themes that the learner needs to take away from the course with them.

As an experienced science teacher who is intimately familiar with the documents used in our system I would venture to suggest that these are the big ideas:

Grade 9 – Health and Safety

Grade 10 – The Environment and what one can do to keep it healthy

So what should one teach? Here’s what it comes down to:

1. What the students want to learn,

2. What you are comfortable teaching,

3. What facilities are available to you?

What the Students want to Learn

The units defined by the Ministry and listed above are great suggestions, I have focused on all of them in various ways over the years but what one should really teach is what the students want to learn! How do I know what the students want to learn? Simple, first of all I ask them and secondly, I observe them.

It is not uncommon to have non-verbal students, or those identified with other types of communication exceptionalities, enrolled in these science classes so asking them has to be done in a different manner than just standing in front of the class and asking, “What do you want to learn?” Instead one must set the stage and employ some unconventional techniques to get the students to communicate their desires to you. I have the advantage of teaching in a real science lab so there are lots of visual prompts all around my room to get kids thinking and talking about science, these include lab equipment, posters, an aquarium, books, safety equipment, the layout of the room, examples of student work, a word wall and even an attached greenhouse.

To get the kids thinking about science and what it is we often do a walk-about where I point things out and invite discussion about them and also ask lots of open ended questions. Such questions usually begin with a how, what, when, where, and why. So I can point to a glass-fronted cabinet full of beakers and ask, “What could these beakers be used for?” or I can take the students into my greenhouse and ask, “Where could all these plants have come from?”; or I can offer a carrot stick to the turtle in my aquarium and say, “Why does this turtle like carrots?” The beauty of asking opened ended questions like this is that there are (almost) no wrong answers and gradually everyone becomes engaged, even if they are not talking.

The question remains, “What do you want to learn about?” After the students have completed their walk-about I give them large (8 cm x 13 cm) sticky notes and have them write, draw, sketch or DOODLE the answer to the question. Oh yes, research tells us that doodling is actually thinking in disguise! Each student is invited to tell the class what is represented on their note and post it on the front board. After class, I collect all the sticky notes, jot down what they mean and file them away. Now I have my ideas for the semester! Inevitably you will have someone who wants to “blow things up” and someone who is interested in “outer space”. The first is easily accomplished by demonstrating blowing up a gummy bear whereas the second is an excellent segue into a research inquiry.


Besides having the students tell you what they are interested in learning about your observations of the students will help you decide what they should or should not learn about. I once taught a student who was always talking about his dog and the weird and cruel things he would do with it – that semester I designed and taught my unit on “Pets”. This unit included not only a research project into maintenance of various pets but an experiential field trip to a pet store where students were presented with facts about the costs of a keeping a pet as well as a classroom visit from a therapy dog. On the other hand I once taught a student with Tourette syndrome whose tic was to shout out words associated with genital anatomy. That semester we did not study reproduction! Another time I had a student with extreme sensitivity to aromatic chemicals, a consideration to keep in mind when deciding what chemistry labs to do.

What You are Comfortable Teaching

Another important thing to consider when planning your semester is your own strengths and weaknesses. One of my passions is caring for the environment. I have kept a vermi composter for years and have integrated it into many lesson plans, which I will blog about soon. Go with what you know and love, your passion is contagious!

What facilities are available to you?

The facilities available to you are also an important consideration when planning your curriculum. For example, if you have no fume hood you probably don’t want to be blowing up gummi bears! If you don’t have running water you are limited even more. If you are in a portable, may God Bless you! Since I have a greenhouse I do lots of projects that involve plants, their germination, fertilization, growth rates, etc but don’t dwell on what you don’t have, look around you, take advantage of what you do have! Your biggest asset is the students and no matter where you are assigned to teach you will have those! And never overlook the myriad of learning opportunities right outside your classroom door – both inside and outside the school. Setting up a school recycling program or doing an electrical use audit gets the students out of their desks and into the rest of the building. And once you walk through the school doors, even if you remain on school property the possibilities are limited only by your creativity!

Have fun and good luck!

Sunday, February 13, 2011

Teaching Science to the Special Needs Learner -- Posting 19

On Ontario we have two courses that are designed for the student with weak academic skills. These courses are Essentials Science, grade 9 (SNC1P) and Essentials Science, grade 10 (SNC2P). Some schools will refer to these courses as “locally developed’ for historical reasons.

The students in these courses usually have a number of learning challenges. It is unlikely most of them will be success in the Ontario Secondary School Literacy Test (OSSLT). Most of them will probably be except and will be graduating with a certificate, not a diploma. When I am looking for science resources to use with them I usually look in the grade 4 – 5 level.

Now that I am a Smarter Science convert it makes teaching these students more fun than ever! No more cookbook labs. The students are in charge of what they learn and how they learn it.

Here are a few tips:

1. Treat them with respect! This may seem self evident but I have often had students tell me that this was the first time they didn’t feel like a dummy in class. Celebrate their successes, every time! When someone reads something for you tell them “Nice reading”, when someone asks a question respond with “That’s an excellent Question, I am so glad you asked”, when someone asks an inappropriate questions say” “This is not the time for us to discuss that but thank you for putting your hand up”, when someone screws up a lab tell them “some of the best scientific discoveries have been made by scientists making mistakes, you might be looking at the Nobel prize one day”. You get the idea.

2. Stay calm and smile! There will be days when you do not feel calm but the very worst thing you can do is YELL, it will take weeks to earn their trust back if that ever happens. When you are going to lose it do something drastic. One of my favourite strategies is to line everyone up and go to the water fountain. I tell them I need a drink of water and I cannot leave them unattended so they all have to come with me. After this, which will take at least 10 minutes, the atmosphere will have changed and you will be fine. Having a sense of humor cannot be over-rated!


3. They must treat each other with respect! Inevitably there will be a student in the class that believes they “do not belong there”. This may be manifested overtly by calling the class “retards” or more subtly by refusing to work with the other students. They have been put into your class for a very good reason so that is not a point to argue. (These may be learners with terrible attendance issues, major substance abuse problems, home lives in crisis, etc.) Instead, find a time to speak to them privately, maybe after class. Explain to them that you know they have a different aptitude than some of the other students but as long as they are in this class this is how is will be . . . . After they have been recognized by you are “not like the others” they feel better about themselves and they are able to participate in class with their dignity intact. In fact, sometimes when there is a funny question or incident occurring I will give this student a secret wink to let them know that I understand what they are also thinking. Another strategy is to ask them to be a “big buddy” for someone that needs a TA but does not have one.


4. They are “real scientists”! A real scientist has to know all about lab safety and wear their safety equipment at all times. Even if the students are simply boiling water and recording its temperature make sure they wear their goggles and tie their hair back. That is what “real scientists” must do. It’s even better if you have lab coats for you and them to wear. I only have a lab coat for myself but I ALWAYS wear it when we do labs. The kids love this! Gloves are a great idea but due to their cost I only let them wear them when absolutely necessary. Ie handling acids. By the way, simply butting vinegar into dropper bottles labeled “vinegar” for the students to work with makes them proud! Even better if you can let them react it with an unknown substance (baking soda) to create a drastic reaction!

5. Lab safety The most important thing for a science teacher to ensure, in any class, is the safety of the students. With most classes we simply hand out lists of rules. In order to prove that we have done our due diligence this is not acceptable with these learners. In the case of an accident a parent could quickly argue that a student with below grade level reading compression could not possible be responsible for knowing and understanding the safety rules. Furthermore, those parents are right. In order to protect both the students and myself I have developed a Lab Safety Manual wherein all the lab safety rules were illustrated with simple diagrams and the students fill in the blanks (cloze activity) to write the rules out. Unfortunately, my electronic copy of this has been lost in the bowels of one of the many computers I have gone through during my teaching career but it would be a simple matter to make a new one by down loading graphics from the Internet. Depending on the technology and time available to your class you could even use a digital camera and have the kids make their own.
6. Structure, structure, structure! Being in a big high school with different faces in each class, at least four different teachers to contend with, moving through the crowds in the hallway, all these little things that most teenagers thrive on can be overwhelming for the learner in essential level classes. Therefore it is paramount that they know exactly what to expect in science class. By removing their anxiety you have opened the door to learning. Your structure will be determined by you and your classroom set up. Here’s what works for me:

· We keep our binders in classroom.

· Prior to their entry put a short list of what will happen in class on board. This can be super simple. For example:

o Return worksheets

o Discuss today’s weather

o Take note

o Video

o Do lab

o Clean up

A list like the one above can serve many purposes. A common question the students will ask, once they are comfortable with you will be”What are we going to do today?” to which you can reply, “It’s on the board.” Since many of the learners will have weak literacy skills they will help each other read it. This will happen naturally and there will be ad hoc discussion around what it means. Encourage this; it leads to predicting and inferring, both of which important skills for building literacy (See how easy it is to embed literacy across the curriculum!) It also allows for some social interaction which is also something these learners often struggle with. Another important skill you will be teaching by having this short list on the board is “How to use a checklist”. Incredibly this is an essential skill identified by the Conference Board of Canada as being important for employability in many jobs yet our students are unfamiliar with them. As the lesson progresses refer to the list and check things off as they are done. Try to provide the student s with a check list of their own from time to time, for example, as part of a lab procedure, etc.

· I always stand at the door to greet the students, BY NAME. For some of these lost souls their names are all they have, honour them by learning it and using it. If a student is named Timothy and only likes to be called Timothy do not call him Tim, without his permission. This year I had a student named Antonio who insisted on being called TJ, don’t argue, just do it.

· As they enter remind them to pick up their binder on the way to their desk.

· Always have the date written in the same format, on the same place on the board.

· Insist that every single piece of paper be dated and put into the binder, in order by date. This sounds so easy but is a HUGE challenge for these students. You may want to keep an ongoing list of what should be in the binder, in the correct order, posted somewhere in the classroom. Once a week go through the binders together to make sure everything is in order. They can even be taken in for marking. Why? Organization is another essential skill that these students often need to work on.

  1. Notes
I often use notes as a settling technique in my class. The note taking is limited to writing down the date, the title and one sentence. Always print on the board, most of these students cannot read cursive writing. Even one sentence is too much for some of the students. For them I provide a print out with just a couple of words for them to fill into the blanks.
Whenever you do give a note ensure it is read aloud and discussed. If the students simply copy it down they will have NO comprehension of what they have copied.

  1. Print Resources

Do not look for a text book to use with these courses. These students are not about textbooks.

McGraw-Hill has published workbooks and teacher’s guides called Essentials Science 9 and Essentials Science 10. These are excellent!

You may find the useful articles in magazines that are geared to younger learners. Two magazine I have found helpful in the past are Science World from Scholastic, each issue comes with a teacher’s guide and Yes! Science magazine.

  1. Video Resources

These students are not able to watch a video and answer a worksheet at the same time. If you plan to do this you will have to read the worksheet one question at a time, pause the video after each question , re-read what the questions was, rewind and show the answer again, discuss it, write it on the board for them, wait while they copy it down, read the next question, repeat. I’m sure you can see that this will become very tedious. Here’s how to make it work:

Write one question on the board, for example; “At what temperature does water boil?” Before putting someone on the spot by asking them to read the question out loud tell the class that is what you are going to do and for everyone to take a moment to read the question silently to ensure they know all the words – some of the students may use this opportunity to confer with you, a TA or each other is they are unsure of any words. Have a student read the question out. After the question has been read out loud discuss it, either all together, a think – pair – share, whatever works in your classroom. Now you are ready to show a video clip which will answer the question. After watching the video clip discuss what the answer is. Oral communication is key!

Video Clips

This is the way to go! Two minutes maximum! As you know there are a zillion on you tube. Because I do not trust our internet connection at school I always download them onto my memory stick using free software called, Clip Extractor.

Bill Nye videos

The kids love these videos, but there is too much content for them to absorb.

I like to use them to show Bill Nye, or one of his colleagues, doing a lab. Then we do the lab. Or visa versa. We do the lab then watch it on the video. This helps the students feel like “real scientists” because they see other “real scientists” doing the same thing.

Most Bill Nye videos are available on you tube. The New York Teachers website has worksheets for most of them (good for the applied level.)

  1. Labs

This is the most important component of the entire course. This is the “hook”! Do at least one lab activity or one demo every day! This sounds insane but for these students almost anything is a lab. Take the temperature of the cold water from the tap and the cold water from the fridge then compare it. That’s a lab. In fact, be creative! This lab could easily take up more than one 75 minute period.

I like to train the students on one or two key pieces of lab equipment and use them over and over during the course. One of my favourites is the graduated cylinder. Why, you ask? First of all, only “real scientists” use graduated cylinders. Where else do you see them? No one has one at home or in their car. Secondly, I happen to have a bunch of plastic graduated cylinders in my lab. (Glass ones can be very expensive.) Thirdly, they are easy to learn to use. I have an entire set of worksheets on “holding the meniscus” as eye level”. Always wear your goggles! Spills can happen! And finally, measuring out a fluid (I like to use water a lot!) is generally a safe part of many labs in the essentials science course.

This semester I am using the beginning scientist Smarter Science framework to help the students work collaboratively to put their thoughts in order, then design and carry out their own investigations. You can see an example of this on my past three blog postings.

Conclusion

You are a hero if you have read this far! I just have so much to tell you. Instead I will stop now. Send me any questions or comments you may have.

Also, you are welcome to come into my classroom anytime to observe and visit. Maybe we could even plan an activity where we get out classes together.

Hope this helps and GOOD LUCK!